Showing posts with label weaving design. Show all posts

Monday, November 7, 2022

Shadow Weave and Weaving Software

It's been an interesting few days spent exploring weaving software and how to convert a profile draft to a shadow weave draft.  I thought I would share what I learned in a post.

 The conventional ways to convert profiles into shadow weave involve having a profile draft with a tie up that lifts 1/2 of the shafts such as a 2/2 twill or a 4/4 twill tie up.  Most weaving software programs don't give you a block substitution for conversion, but I found three that do.  WeavePoint, Proweave & Windows Weaveit Pro.  

It all started with  a profile draft on Handweaving.net  (#32432) that I liked and wanted to see how it would look in shadow weave. 

Because my weaving software of choice is WeavePoint, I tried translating it to shadow weave using the Translate Profile option.  WeavePoint gave me what I was looking for.  A four shaft, shadow weave design.  Great!

I had my draft and could have stopped there.  But, I didn't.  I wanted to see what other software programs would do and this is where it got interesting.  I found that Fiberworks didn't give me any options to convert profiles to shadow weave.  I did find that there were tutorials to help you do this - but with one caveat, that the tie up be in the format of 2/2, 4/4, 6/6 etc.   I didn't have this in my original profile and if I put a tie up like that into my profile the whole design would be different.  

Then, I tried Proweave.  I don't use this software very much, but it does have a lot of translation options to different weave structures.   I found a bunch of different options, so I took the one for four blocks and no incidentals.  


Great - but this is an 8 shaft draft and the block lengths have been expanded.  I could work on the draft to downsize the length of the blocks, but it didn't seem like a better choice than WeavePoint gave me.

Off to Windows Weaveit Pro.  This program gave me three options for converting my profile.  Atwater method, Powell method and Lang and Voolich method.  This was interesting because I hadn't heard of Lang and Voolich before - something new to me.  My first tries were with Atwater and Powell.  Both of the translations gave me a draft - but not for the original profile.  Instead, the software had evidently changed the tie up to a 2/2 twill because when I changed my profile tie up and looked at the pattern, the translated pattern looked identical to the thread by thread draft.  Next I tried the Lang and Voolich option.  Yeah - it gave me a correct draft, but again, one for 8 shafts.

I could have stopped there, but I really wondered why WeavePoint would give me a 4 shaft draft and the other two programs gave me an 8 shaft draft.

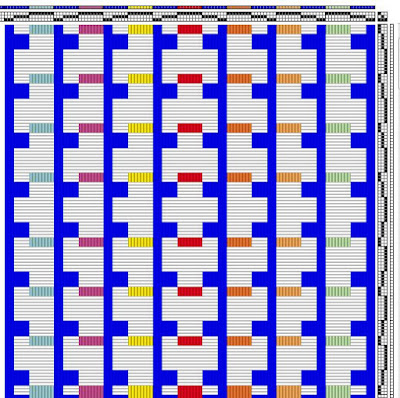
As I looked at the WeavePoint version, I realized that actually the profile was three blocks and Weave Point had analyzed this before it translated my profile.  And, where there was a transition from Block A to Block B, there was a double thread inserted so that the color sequence of dark and light wouldn't be interrupted (examine the first draft in this post).


So, I went back to the three programs to see how they would deal with my new, three block profile.  WeavePoint was happy.  It translated  exactly as it had the first time.  Proweave, translated it to a 6 shaft draft and Windows Weaveit Pro wouldn't give me an option to translate it at all.

 I think if you examine the profile and the solution that WeavePoint gives you, you could probably figure out other profiles.  I also tried to find Lang and Voolich's monograph, Parallel Shadow Weave  but couldn't find any current source for it.  Even Complex Weavers didn't have a copy in their library.  It would be interesting to see how their solution worked - even though it wasn't as elegant a solution as WeavePoint gave me.    

 Yeah for the WeavePoint programmer, Bjorn Myhre.


Sunday, October 2, 2016

Squeezing the Numbers to Design a Weaving Draft

When mathematicians become interested in weaving, the first thing they turn to are ways to express weaving design using the tools they already know so well.  It works in reverse too.  Weavers start using numerical sequences, algebraic equations and more to make their weaving more interesting and give it a new dimension. 

The first mathematical sequence I learned to use in weaving (well, in knitting too) was a stripe generator called the Fibonnaci Sequence.  For years, I used the first numbers in the sequence, not even thinking that maybe I only needed to use just a portion to make interesting designs.  Instead of starting with 0,1,1,1,2,3  maybe I could cut to 3,5,8,13 or just leave it at 3.5.8.  It really only occurred to me recently that I didn't need to reserve the sequence for stripes - it could be also used for profile drafts.  3 - 5 - 8.  Reverse it for a symmetry, add color and you have a fine piece to work from. Another trick to change the look of this profile - change the tie up box and see what happens.

 
When you start looking for these ideas, they seem to just pop out of the woodwork.  I was taking a trip around my Handwoven magazine collection, seeing what I could find in the way of interesting designs for towels.  I ran across an article in Jan/Feb 1998 called Algebraic Expressions:  Design for Weaving written by Lana Schneider. She described a method of design developed by a math teacher called Ada K. Dietz in 1946.  Ada used algebraic equations to create profile drafts, color sequences and even thread by thread sequences for weaving.  Wouldn't it be wonderful if I could actually read Ada's work?  Turns out, the PDF file is available from the Handweaving.net and it's a free download.
 
Well, this was just too good to be true.  It seems Ada instinctively knew that many of us had forgotten what we once knew about the square or cube of a binomial.  She spelled it out for us and gave us some examples showing how she used (a + b)²  The breakdown is in her article, so you don't need to sweat out her procedure all by yourself.  The Handwoven article is nice and tidy and easier to read, so if you have access to that, use it.
 
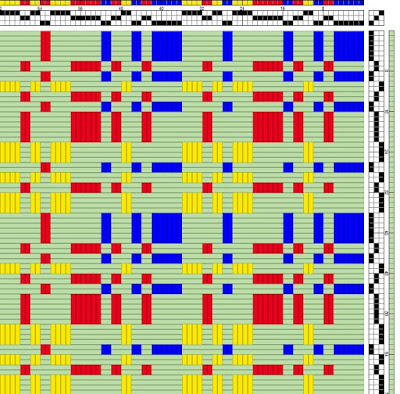
After reading the document about Ada's work, I jotted down  the letter sequences to use in a variety of experiments.  The draft above was based on the cube of a binomial.  (a + b)³.  When broken down to its most basic form it becomes aaa + aabaabaab + abbabbabb + bbb regroup aaaaa b aa b aa b a bb a bb a bbbbb  (24 units).  I used this sequence as the basis for my twill tie up and then used the sequence again for color in the warp and weft. Once you have pulled the sequences out of Ada's work, you can experiment with a variety of ways to use them.
 
Here is the square of a trinomial represented in a profile draft with colors following the sequence as well.  (a + b + c)²    aa + abab + acac +  bb + bcbc + cc 18 units
 
 
Then, on to Pascal's triangle.  It's fun to google these topics because you come up with  great tutorials for kids (and adults) .  Here is a good one about Pascal's triangle.  I used the fifth row of numbers in Pascal's Triangle for blocks ( 1-4-6-4-1), then mirrored that configuration in the warp.  For the weft, I used the fourth row of numbers (1-3-3-1) and mirrored it as well.  Here is one possible profile draft.  Others can be created by changing the tie-up.
 
These drafts are similar to those built on words.  They are a means to an end and if you don't particularly like what you have created, you can always tweek it to make it more pleasing.  Using this technique for design does help to break down barriers and gets your brain moving in the right direction.  Start with one of these math equations or numerical sequence ideas, expand it  and go from there into something uniquely your own.


Thursday, May 21, 2009

Designing Interesting Warps for Public Weaving

I belong to a great Complex Weavers study group called the Computer Aided Design Exchange. Each year we are required to write a paper on some aspect of weaving design using our weaving or other computer software. Beyond those simple rules, the subject matter is entirely up to us. Everyone who belongs or has belonged to this group, will attest to the value of seeing other people's design work and finding out how it was achieved. Sometimes ideas are still being formed when a paper is written and the entire process will play out over a year or two while the designer experiments and refines their drafts This past March, I needed to write up my own yearly contribution to the group and I had some ideas percolating in the back of my head that I had wanted to put into written form for a long time. I have believed for some time that weavers are an endangered species; there just aren't that many young ones! One of the ways that we can entice new people to take up weaving, is by doing public weaving demonstrations. There is nothing like seeing the creation of a piece of cloth to astound and inspire. But, I also believe that we weavers, often take an easy road when we warp those demonstration looms. When the opportunity came about several years ago to warp a loom for guild members to weave off the during the county fair, I decided to design a warp that had complexity in the threading, that would be suitable for many different tie ups and would be interesting with a straight draw or point treadling.


 It really wasn't as difficult as I had imagined. Straight draw threading along both sides gave the piece a border. I added an advancing threading and repeated it several times, then I put in some point threading. Once I had gotten to the middle of the warp , I mirrored the whole thing. What you see above is a very shortened version of the entire threading. I used Ralph Griswold's weaving document site to download lots of great 8 shaft tie ups, but the Handweaving net is now available and today I would probably use it as my source. I wanted tie ups that had floats no longer than three threads and preferably only two threads. I plugged potential tie ups into my threading draft one by one and saw how they looked with a straight draw or point treadling. After each try I checked the length of the floats in the draw down. The very best designs were those whose floats were only 3 or 4 threads. I printed out drafts and drawdowns for about 20 designs that would work with the threading. (There were actually many more than that -- I just printed the best ones).  

 The loom was warped with 13 yards of yellow 8/2 cotton. When fair time rolled around, our volunteer weavers brought their own wefts or used some donated ones to weave a towel. Each person picked a design they liked and one or the other of us who didn't mind crawling under the loom, changed the tie up for the desired pattern. During the fair we wove off almost the entire warp to large audiences. The straight or point treadling was easy for weavers to keep track of and we provided someone to talk to the public to relieve the weaver of unnecessary chit chat while they wove. Once the fair had ended, I took the loom home and a couple of us wove off the rest of the warp using more complicated treadling sequences (which had also been checked for suitability with weaving software). At the next guild meeting, everyone who wove a towel had a wonderful piece of show and tell. Each towel was different -- even those that had used the same pattern because the weft colors were different. Questions from our audiences ranged from basic to advanced and more than one person had an "aha" moment when they saw how pattern was being created by different shafts being raised and seeing how multiple shafts were tied to treadles. Did we inspire anyone to run out and buy a loom? We will probably never know. But I think we did plant seeds that may, in time, grow into weavers!